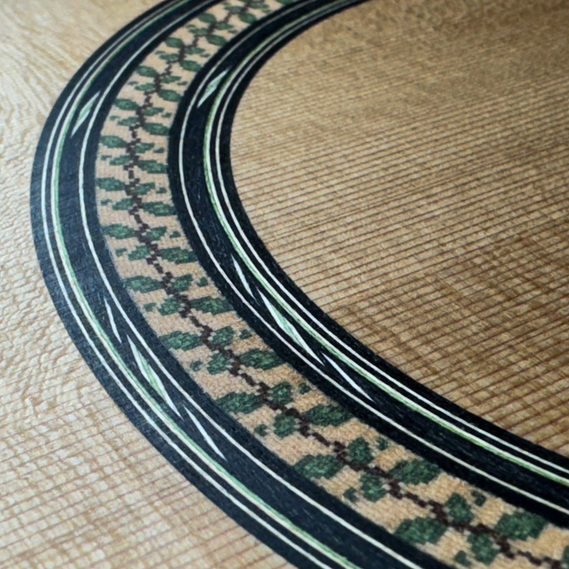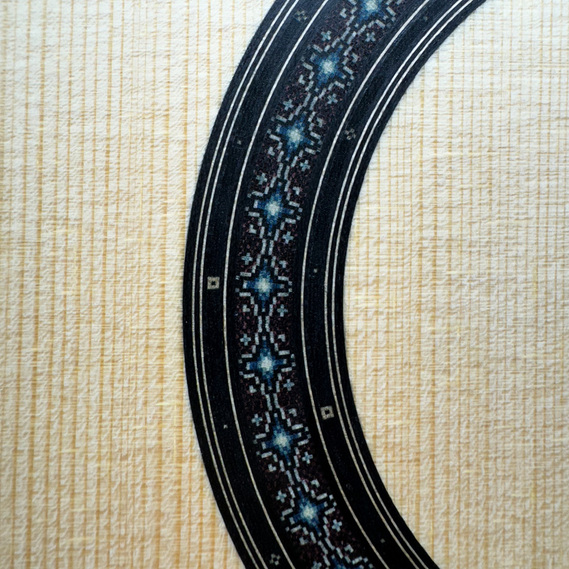
the rosette


Originally designed to reinforce the sound hole, the rosette is now one of, if not the most creative aspect of the guitar. Most luthiers have one design for all of their guitars which acts as a signature. However, since the very beginning of my guitar making journey, I decided to make a completely unique rosette for every guitar, which gives each of my guitars their own theme and identity.
When building a guitar for a specific client, I work closely with them to design a rosette which fits their own personality and interests so their custom guitar feels even more like their own.
The design and creation of a rosette is about thirty to forty hours of work.
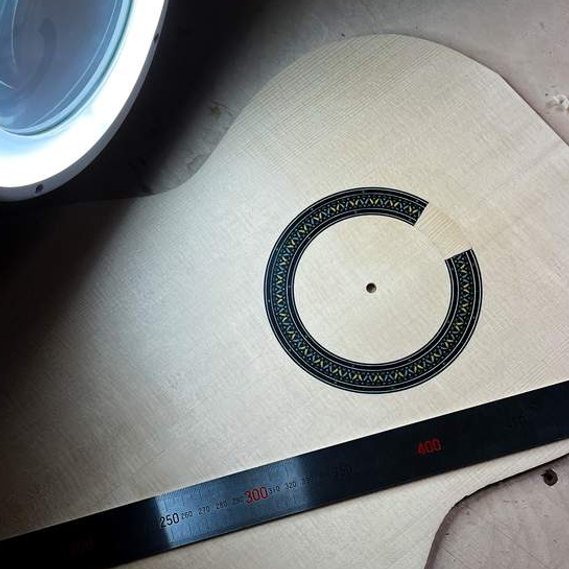
Below you can see how a rosette comes together

It starts with a design
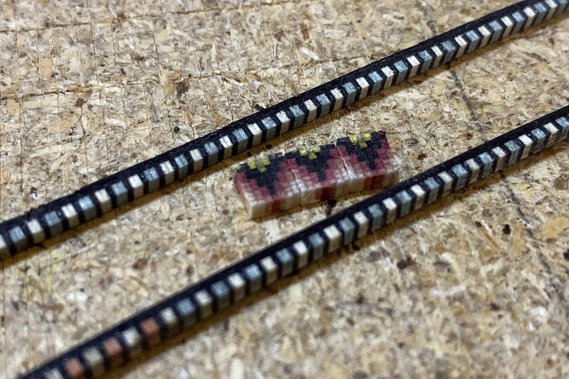
Each square in the drawing represents a 0.5x0.5mm square of natural or dyed veneer.
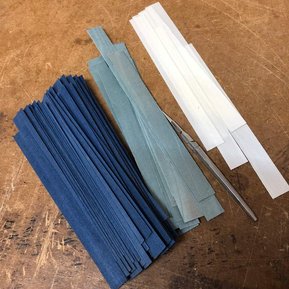
We cut strips of veneer to make up each of the unique columns in the design.

The veneer strips are then glued together into stacks for every column of the rosette

Once the glue has dried, the stacks are planed

And then strips 0.5mm thick are cut off the sides of each stack
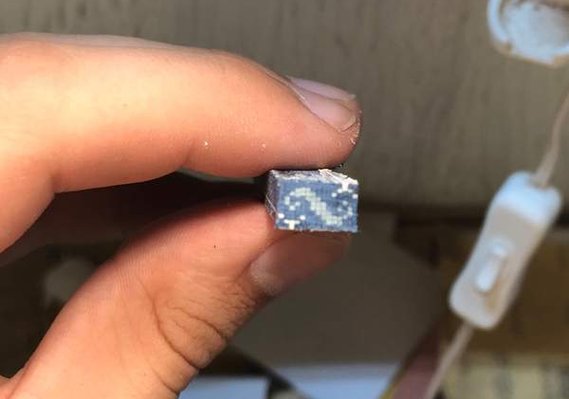
We glue all of the strips together in the correct sequence and end up with a stick of our design

A slight taper is cut on the sides of the stick to allow the tiles to go around the sound hole and then the tiles can be cut off the end of the stick

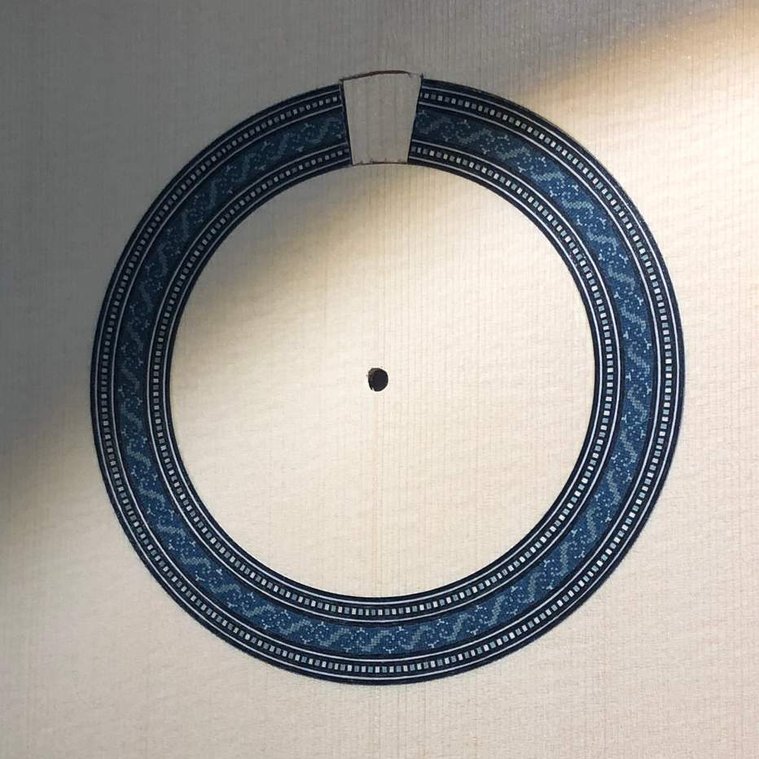
Before the rosette can come together, there must be rings to surround the tiles. I usually make my rings out of several straight veneer strips with a special inlay in the middle

Once everything is ready, I glue my rosettes in a non-stick plastic mould with hot animal glue
When the rosette is dry in the mould, it can be easily removed from the plastic and glued into the soundboard. After several hours, the rosette is ready to be cleaned until it is flush with the top
rosette gallery